There is good news for all Samsung Galaxy S4 Exynos 5 Variant users. There is a new firmware update which isn’t available for the moment for all S4 Exynos 5 Variant users from beginning. This available for several countries as Russia, Sri Lanka, India and Bangladesh.
This latest update is named I9500XXUBMG1 and it is an official one build on Android 4.2.2 Jelly Bean firmware. This will improve the customization and stability. The update is available for download and install via OTA, but users can use Samsung Kies server as well for doing that.
The new update (I9500XXUBMG1) is an unbranded official version of firmware, and it can be downloaded and installed on any Samsung Galaxy S4 GT-I9500 device without devices from CHINA, Hong Kong and Taiwan.
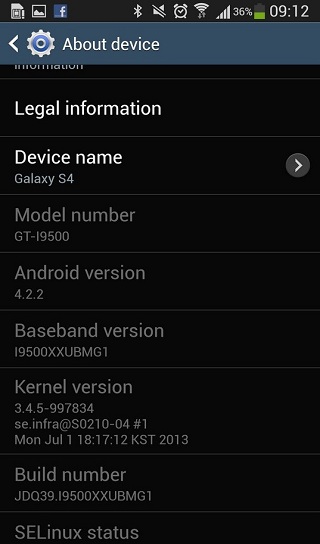
The I9500XXUBMG1 update is only for Samsung Galaxy S4 GT-I9500 model, Russian build. It is based on Android 4.2.2 and has been built in 1 July, 2013.
It’s PDA is I9500XXUBMG1 and CSC: I9500SERBMG1with SER Product Code and MODEM: I9500XXUBMG1 such as firmware details.
This tutorial is provided only for educational and instructional purpose and Android.sc team will not be held responsible or liable for any data lost or damage to the smartphone.
Pre-requisites
- Download and install suitable USB Drivers for Samsung Galaxy S4 model number GT-I9500. These drivers help the device to communicate and transfer files between it and PC.
- Now, go to the next path: Menu>> Settings>> Applications and from there navigate and tap on the Development option and make sure that the USB Debugging Mode is enable, if not check the USB Debugging Mode option.
- Create the backup all your important data stored on the internal device’s memory.
- This tutorial might wipe out all your data stored on the device’s memory. If you are running a custom recovery image as ClockworkMod or TWRP recovery then use the same to get a full Nandroid backup for your actual ROM.
- Make sure that the device’s battery should have more than 85 per cent of power left.
- The S4 device should be a factory unlocked device, and it isn’t locked to a specific carrier.
- After you apply this official build update the root rights will be reworked.
- All of the custom ROM or custom installations will be removed after installing the update. The I9500XXUBMG1 Android 4.2.2 Jelly Bean can be applied and works only with Samsung Galaxy S4 GT-I9500 and do not apply the same for any other similar device,
- Make sure that the model number of the Samsung Galaxy S 4 is the correct one by verifying to the following path: Settings>> About phone >> Model number.
How to install I9500XXUBMG1 Android 4.2.2 Jelly Bean on Samsung Galaxy S4 device
- First, Download the Jelly Bean 4.2.2 XXUBMG1 pack file from here, and save the same on your PC.
- Second, extract the downloaded pack firmware archive to get a .tar.md5 file and other functional files.
- Download Odin 3.07 flashing application from here, and extract its content to obtain Odin3 v3.07.exe file and other few functional files.
- Power off complete the Samsung Galaxy S4 device.
- Now, boot the smartphone into Download Mode and for doing this, press and keep holding the Volume Down+Home+Power buttons simultaneously, until an Android robot icon with some constructions elements appear, press the Volume UP and the device will enter into Download Mode.
- Now, Open Odin3.v3.07.exe file as an Administrator.
- While it is in the Download Mode, connect the Samsung Galaxy S4 device to PC via USB cable.
- Now, wait until the Odin will recognize your device.
- When the S4 is connected successfully, on ODIN app an Added message will be displayed, and the ID: COM box will be colored blue..
- In case, the Added message does not appear, you need to reinstall the drivers once again and to use another USB port from the PC.
- Next you need to load and install the firmware’s files that you have extracted before on the I9500XXUBMG1 folder,
- To do that follow the next steps:a) From ODIN click the PDA button and browse and select the file that contain .tar.md5extension
- b) From ODIN click the Phonebutton and browse and load the file which containMODEMword in its name
- c) From ODIN click CSC button and now browse and select file that contain CSCin its name
- d) Click the PITbutton from ODIN app and select the file that has .pit file extension.
Note: In case the steps b,c and d if such files are not corresponding with our above specification you can ignore them one by one.
- Important: in ODIN app you need to make sure that the Auto Reboot and F.Reset Time options checkboxes are selected.
- Uncheck the Re-Partition option, this option must to be selected only when a .pit file is being to be used.
- When all of the configurations are correctly made, click the Start button in Odin app,
- Once the flashing process is done, the S4 device will take an automatically restart.
- Also, on the ODIN app’s interface will be displayed a PASS message with a green background, that’s the message that say the installation is successfully done.
- Next, disconnect the USB cord from the PC.
Congratulation, the Samsung Galaxy S4 device should running on the official I9500XXUBMG1 Android 4.2.2 Jelly Bean firmware.
Troubleshooting:
In case the Samsung Galaxy S4 device gets stuck on the first boot animation or at the Samsung Logo you have to do:
- Forced power off the device.
- Boot the same on the into recovery mode (press and keep holding Volume Up + Home + Power buttons simultaneously.
- From the recovery mode menu perform data wiping action, to do that select Wipe data/Factory Reset and then select Wipe Cache Partition.
- Now, after the wiping task is done, return to main recovery menu and select from there reboot system now.
Note: for navigating into Recovery Mode menu, use Volume keys and Power button to select the desired option.
Important: When data wiping action is applied on all the data stored in the internal memory of the device is erased.


