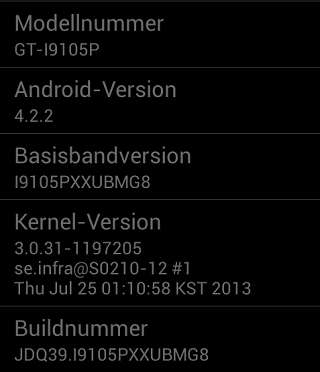
The new Android 4.2.2 Jelly Bean XXUBMG8 has been rolled out for Galaxy S2 Plus in Germany.
Today, we will present you a step by step instructional guide about how manually install Jelly Bean 4.2.2 XXUBMG8 firmware for Galaxy S2 Plus device. This step by step guide is especially provided for users who didn’t receive this latest official update.
During the tutorial, we will use ODIN app, it is a flashing tool developed by Samsung, and with its help we will flash the firmware update file.
The installation of an official Android OS will restore warranty for devices that are currently rooted.
The devices which running a custom ROM and will flash this file, will be completely wiped during the flashing process.
The new update comes with multiple improvements and new tweaks which can be used for enhance your Android experience.
Before to move at the step by step installation guide, some prerequisites are necessary for be applied first.
Pre-requisites:
- This guide works only with the Samsung Galaxy S2 Plus variant device model number I9105P.
- Do not use this guide for any other incorrect version device, as you’ll end up bricking them.
- If your Samsung Galaxy S2 Plus I9105P device is running stock Android 4.1.2 JB firmware, no data will be deleted in the installation process.
- The custom ROMs of your device will be wiped by the installation process and all data stored into device’s internal memory will be deleted.
- If the Samsung Galaxy S2 Plus I9105P device is a rooted device, but has running stock ROM firmware, you need to know that the root access will be revoked. However, data stored intro device’s internal memory will remain intact.
- Download and install the appropriate USB drivers to the PC. In case you don’t have the suitable driver, it can be downloaded from here.
- Take the backup of all of your data stored into device before beginning the manually update.
- Uninstall or disable all the security programs as antivirus or firmware and the Samsung KIES app .
- Odin will be used to manually update the device.
- From the Developer Option menu enable the USB debugging option. In case the, Developer Option isn’t showed in the Settings menu, you need to open About Phone menu, browse Build Number option with scroll down and tap on the Build Number section 7 times.
- Charge the Samsung Galaxy S2 Plus device battery at least 70 % .
- Do not skip any step mentioned in this article.
- This step by step instructional guide should be applied only by Android advanced users who have idea about flashing firmware files using ODIN app.
- All instructions listed here are provided only for instructional and educational purpose.
- Don’t blame us in case, you lose any data or brick the Samsung Galaxy S2 Plus device during or after the installation process. Use this guide only in your own risk.
How to install Android 4.2.2 XXUBMG8 Jelly Bean OTA Update for the Samsung Galaxy S2 Plus I9105P:
- First, download the official Android 4.2.2 XXUBMG8 Jelly Bean zip file fromhere and save it in your PC.
- Second, extract the downloaded file, when the file is downloaded totally, and make sure you’ll get an ‘I9105PXXUBMG8_I9105POXABMG8_DBT.tar.md5‘file. (Do not extract any other file).
- Now, download ODIN app from here (Odin3 v3.07), save it in your PC, extract ODIN contents and save all its files into a single folder to PC.
- Now, turn off the Samsung Galaxy S2 Plus I9105P device.
- Boot it into Android Download Mode. (Press and keep holding the Volume Down, Home and Power buttons and release them when a warning message is displayed, press the Volume UP to confirm the Download Mode Menu request).
- Now, open ODIN3 v3.07 exe file on your PC.
- Connect the Android device to the PC using the USB data cable.
- Now, look into ODIN window and make sure that it says ‘added!!’ message, this means the Samsung Galaxy S2 Plus device has been recognized.
In case the ‘added!!’ message doesn’t appear, you need to disconnect the S2 Plus device from PC, change the USB port and reinstall the USB drivers once again. - If everything is set correctly and the device is recognized by ODIN, you can move forward.
- From ODIN window press the PDA button.
- Now, browse your PC and selectI9105PXXUBMG8_I9105POXABMG8_DBT.tar.md5. file, load it into ODIN app.
- Next, make sure that you don’t change any other default options of ODIN.
- Make sure that the Re-Partition option is disabled.
- When you want to begin the installation process, click the START button from ODIN.
- Now, wait around 6 minutes to complete the installation process.
- When the flashing process is done, the Samsung Galaxy S2 Plus device will get an automatically reboot.
- Disconnect the Galaxy S2 Plus device from PC, you’ll see the Samsung boot animation.
- Now, the device will boot into normal mode.
Troubleshooting:
Note 1: If ODIN shows the ‘FAIL’ alert or it freezes while flashing the new updating files, you have to do:
- Disconnect the S2 Plus device from PC
- Close ODIN app.
- Now, remove the device’s battery and re-insert it after 6 seconds have passed.
- Next, repeat the entire step by step guide once again. (Do not skip any steps)
Note 2: If ODIN app says that the flashing process has passed, but the Samsung Galaxy S2 Plus device gets stuck at the first Samsung boot animation logo, you have to boot it in Stock Recovery Mode and from there apply a factory reset. This task will erase all contents from your device system partition, but will force the android device to boot the new firmware in normal mode.
Follow the next steps to do that:
- Turn off the Samsung Galaxy S2 Plus device.
- Boot it into stock Recovery Mode (Press and keep hold in the same time the Volume Up, Home and Power buttons, release them when the device’s scream flickers.
- In case, the recovery mode doesn’t appear then repeat the ‘press and hold buttons’ task until it will appear.
- Now, from the Recovery Mode menu select ‘wipe data/ factory reset’ option and confirm.
- Next, return to the Recovery Mode main menu when the factory reset is done.
- Select ‘reboot system now’.
- The first boot can take several minutes to complete.
For more supplementary questions and help post a detailed comment on our comment section below.


