Do you know how to install the TWRP Recovery on the HTC Droid DNA device? If you don’t, we will teach you in this article. This installation guide has been released by Dees_Troy (an XDA member). The name TWRP comes from the abbreviation Team Win Recovery Project which is another great recovery image Like you probably know about TWRP Recovery, you’ll be able to flash custom ROMs.
Pre-requisites:
- All instructions are compatible only with the HTC Droid DNA. You’ll need a PC which running Windows OS, and on this PC don’t run the HTC Sync software.
- Install the HTC USB drivers compatible with your HTC Droid DNA smartphone.
- Your HTC smartphone need to be an unlocked bootloader. Without this you can’t install this custom TWRP Recovery image on your device.
- Disable/uninstall any security software (antivirus and firewall) installed on devices. Enable the USB Debugging option from the next path: “Settings > Applications > Development > USB debugging”, It will connect your smartphone with your computer.
- This guide is for advanced and you need to know the flashing process for your device. Don’t blame us in case you loose any personal data or files while the installation process.
Read all instructions carefully.
Install TWRP Recovery on HTC Droid DNA-tutorial
- Download Fatboot zip file from HERE and save it in your computer. After you downloaded extract the content and save them in a single folder in your PC. This folder should be renamed ‘fastboot’.
- Now download the second file, the TWRP 2.4.0 zip from HERE and save the same in your computer, after you download to rename this file to ‘recovery.img’.
- Move this ‘recovery.img’ file in the Fastboot folder.
- Power off your HTC device and boot it into Fastboot mode; to boot in the Fastboot mode, press Volume Down and Power buttons. These buttons will load the Bootloader Mode menu, select ‘Fastboot’ option.
- Now connect your HTC Droid DNA to your computer using the original USB cable.
- Go to ‘Fastboot’ folder on your desktop PC and there press Shift key and, at the same time, right-click the folder’s white space. The CMD (Command Prompt) window will be displayed and you have to enter this command: fastboot devices
- After this command, you’ll need to Install the TWRP Recovery by entering the following command line: fastboot flash recovery recovery.img
- After the previous command type this: fastboot reboot
- This last command will restart your HTC smartphone and boot into normal mode.
- Congratulations, you’ve successfully installed TWRP Recovery on your HTC Droid DNA smartphone.
Install Theme UI fix for your HTC Droid DNA smartphone
- First, download the FactoryROM TWRP DNA UI zip from HERE and save it on your PC desktop.
- Now rename the previous downloaded file to ‘ui.zip’.
- Power off your HTC device and boot it into Bootloader mode. For entering in the bootloader mode, press the Volume Down and Power buttons.
- Select the ‘Recovery’ option. A TWRP folder will be added to your HTC smartphone’s internal SDcard.
- Select ‘reboot system’ from the Recovery menu; boot your device into normal mode.
- Now search the TWRP Folder using a File Manager.
- Create another folder named ‘theme’ inside the TWRP Folder.
- Connect the smartphone to Computer with help of USB cable, copy/paste (transfer) the ‘Ui.zip’ file in to the ‘theme’ folder.
- Power off your HTC smartphone.
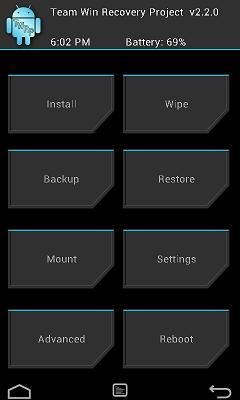
- Boot into TWRP Recovery to verify that the theme was installed with success.
Congratulations, you’ve successfully learnt to flash this custom recovery image on your HTC device.