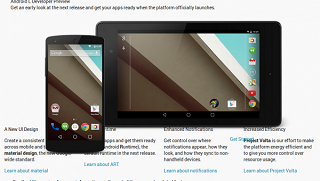
Yesterday, Google has launched the new official Android L Preview Factory Image for Nexus 7 Wi-Fi 2013 edition.
The new Factory Images are now available for developers who want to work on releasing their brand new Android upgrade in order to offer tons of great new features and functionality such as a better battery life, new Google Android Experience with a new User Interface.
With the new Factory Image of Android L Preview OS you will be able to install it on your Nexus 7 model version 2013 Wi-Fi and to test the new Material Design UI/UX in action. With the new Android L Previous flashed on your device you should know that the bugs and errors existent on it will be discover and reported for be resolved by Google developers team for the official release of this OS.
Flashing a Factory Image of the new Android L Preview OS on your Nexus 7 2013 Wi-Fi device isn’t so difficult, but this installation will wipe all your data stored there. So, do the installation operation at your own risk.
The rumors report that the final Android L Update will be available in the fall and will be named Android 5.0.
By visiting the Google’s Android Developers website the user can find the links for both Nexus 7 (2013 Wi-Fi) and the Nexus 5 devices, but you can read more details in the official web page to know more about this new release.
Unfortunately, the Google Nexus 4 and Google Nexus 10 devices will not receive the new Android L Preview Factory Image very soon.
So, if you are an owner for Nexus 7 2013 Wi-Fi device or for Nexus 5 device and you want to test the new Android L OS, then you can download the Factory Image and then flash it on your device.
As you probably know that, you should configure the Android SDK on your PC to install the USB drivers for the device. So, the USB drivers can be installed by running the Android SDK Manager.
To download the new Nexus 7 Wi-Fi 2013 “razor” Android L Preview Image you can do this from here.
Download the file on your Computer, then unzip the .tgz archive and then unzip the .tar file. Now, connect the Nexus 7 device to your PC and then open the Command Prompt where you have save the files.
Unlock the bootloader of your device by using the “fastboot oem unlock’ command and then launch the “Flash-all’ script to start the installation process.
After you have installed the Android L Preview System image on your Nexus 7 2013 WiFi device you can tell us in our comment section about the new features and improvements that the new Android L OS comes.


