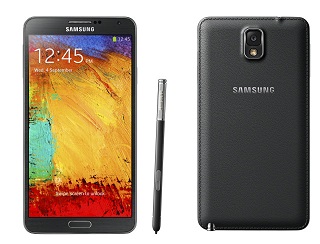
Do you wish to install the latest Android on Galaxy Note 3 SM-N9005? Don’t worry, the official Android is already out in the market, ready to be install on the Galaxy Note 3 SM-N9005 devices.
Samsung Galaxy S3 device received the latest official Android 4.3 XXUBMJ1 update. The new update has been released for both versions of S3 SM-N9005 device, Exynos and Snapdragon models. The new Firmware is offered by OTA or via Samsung KIES application.
We have prepared a step-by-step guide to teach you all how to manually install the latest Android 4.3 XXUBJ1 Firmware for Galaxy Note 3 N9005 device. The OS has been released in the countries like United Kingdom, Russia and France.
Pre-requisites and guidelines:
- The latest official Android 4.3 XXUBMJ1 JB update and all instructions listed here in this tutorial are limited and work only with Samsung Galaxy Note 3 SM-N9005 version. Knowing that don’t attempt flashing this new Firmware on any other device, otherwise the device may get damaged.
- Verify the device model number from the next path: Settings>About Phone.
- Download and install the suitable USB drivers for Galaxy Note 3 N9005 device on PC. If you don’t have the correct USB drivers, then you can download them from here.
- Disable or uninstall all the security softwares as Antivirus, Firewall, Antimalware programs and Samsung KIES as well from both PC and Android device.
- This is a manual method for installing the official update and a back-up of all your data and settings stored on the phone is absolutely necessary.
- Now, ensure that the device has enough power left in its battery. It should be more than 75% charged for this operation.
- All instructions, files and programs listed here are provided only for educational and instructional purposes, we (Android Source Team) can’t be responsible or liable if you lose any data or damage your device during or after following this guide.
How to install the latest official Android 4.3 XXUBMJ1 Jelly Bean Firmware On Galaxy Note 3 N9005.
- Download Android 4.3 XXUBMJ1 Jelly Bean Firmware file from the link, and save it in your PC.
- Extract the downloaded firmware zip file to obtain a .tar.md5 file and some additional files.
- Download Odin v3.07 from here, save it in your PC and extract it to get Odin 3 v3.07.exe and few other files.
- Power off the Galaxy Note 3 device.
- Boot it into Download Mode. (To do this press and keep holding the Volume Down and the Power buttons at the same time until the icon with a construction Android robot is displayed. Then press Volume Up button for entering into Download Mode menu.
- Now, run Odin app (Odin v3.07.exe file) as administrator.
- Connect the Note 3 device to the PC using the USB cable while the device is still in Download Mode.
- Now, wait until the ODIN app will recognize the devices and the “added” message appear and the ID: COM box will turn light blue.
- Click the PDA button from ODIN and select the .tar.md5 file.
- Important: In ODIN app’s interface, enable Auto Reboot and F.Reset Time options. Also, the Re-Partition checkbox must be unselected.
- Verify once again if you follow all the steps correctly.
- From ODIN hit the Start button to start the firmware installation.
- Once the new official firmware is successfully installed, the Android device will automatically reboot and a PASS message will be displayed on ODIN with a green background.
Congratulations, you successfully learned how to manually update the Samsung Galaxy Note 3 device with the latest Android 4.3 XXUBMJ1 Jelly Bean firmware.
Note: for verifying the firmware version go to: Settings > About Phone
Troubleshooting:
If the Samsung Galaxy Note 3 device is stuck at the first boot animation you need to do:
- Enter into Recovery Mode by pressing and keep holding the Volume Up and Power buttons at the same time.
- From the Recovery Mode select Wipe data/Factory Reset and Wipe Cache Partition.
Note: When a data wipe task is performed all the data stored into device’s memory will be erased, not data from the external SD card.


