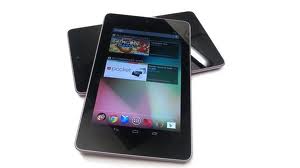
The technology has really revolutionized our imaginative power. Everyday something is either invented or introduced that makes our life simpler and comfortable.
Did you know that now with just a click you can root, unroot, backup, restore and unlock/lock the boot loader for your Nexus 7 Tablet device. You can install the APKs, and flash system recovery image, all this with just a click.
The WugFresh user of XDA forum community has shared this great work. If you want to root your device with a set of ADB commands, you need to have installed the ADB on your PC properly.
This tutorial about rooting procedure will be compatible and work only on the latest firmware of Jellybean 4.1.1. It really helps in the User Interface which is very
Before applying any firmware on your device, we recommend to you to take full backups of all your important data. By following our below mentioned tutorial you can take all the backups
- For backup and restore your SMS, we recommend using “SMS Backup & Restore app”,
- For sync your Contacts a good way to do this is Sync with the Gmail application,
- For your important Images file, Songs file and Videos Files, we recommend to copy it on an internal / External SD Card.
The internet settings you can save APN and MMS Settings when you note down from the path “Applications > Settings > Wireless and Network > Mobile Networks > Access Point Names”
When all this instructions mentioned above are done, you can proceed to next steps where you will find the detailed tutorial about how to customize your Nexus 7 Tablet device with only a click.
Disclaimer: This post is only for the educational purpose. So if, anything happens to your device we are not responsible for that.
How to customize ASUS Nexus 7 with One Click Tool:
The first step is to Download the One Click Rooting Tool on your PC. When the download is completed, you should install the tool on your computer.
Now, please verify that the USB Debugging is enabling on your device, for doing that, please follow the next path: “Settings > About Tablet” section.
For installing the tool on your computer, please follow the screen instructions. The installation is simple. It is just like any other windows applications:
To see the current firmware name on your Nexus 7 Tablet, please check this from the following path: “Settings > About Tablet”. Here you will see which firmware version is installed on your tablet.
Now select the same option like the image showed and after that you should connect your Nexux 7 tab to your PC with the original USB cable. After the connection is ok, now click on “OK” and select the action which you want to perform for your device from this simple dashboard user interface which you see below.
Note: If your device doesn’t boot up, you should press for a longer time the Power Button, or take off the battery and after reinsert it to turn off the device. After that, retry to apply the process from start.


